
This article is part of the WordPress collection. The article details how to configure and install Mailjet on your WordPress instance. The procedure will be similar if you decide to use a different outbound mail relay.
The steps are simple.
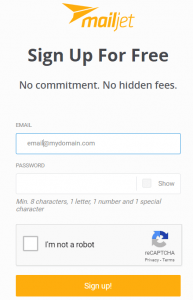
1. Create a MailJet Account
First things first, create a Mailjet account — with a few recommendations
1. Go to mailjet.com

2. Create a unique Mailjet account for each domain that you manage. This way you’ll be able to manage problems with mail sending independently from each different domain. Otherwise things will get more difficult during the SPF/DMARC testing later on.
While not required, I recommend using an email address on the target domain as the username, such as “<someemail>@marksatterfield.com” to manage emails for the domain “marksatterfield.com”. Using a domain email just simplifies the rest of your life later. Also, you’ll be able to remember which account is attached to which domain.
Select “I’m a developer” so that you can “Access all the details to integrate Mailjet with your tools and send emails quickly“. This will be required to integrate into any platforms such as WordPress (via Plugin) and PIM (the mail front end, explained later). For now, just select this option.
You have successfully created a Mailjet account! Make sure to record your password somewhere.
TEST: Log out and log back into the Mailjet site. This indicates that your account creation was successful.
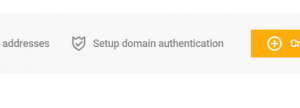
Configure domain authentication
The second step in this process is to approve that your domain can actually send through MailJet. The process is quite simple and straightforward, but if done incorrectly it is going to take you a long time to figure out you are getting nowhere.
You’ll need access to the domain’s DNS. DNS (Domain Name System) is the roots of the domain. When modifying the DNS records, be aware that improperly changing the DNS records can yield the domain inoperable. The two records that must be modified are simple to do, and if you follow the directions properly there will be no problems at all. If you do not have access to the domain’s DNS, or you are uncomfortable modifying DNS, then you might consider finding someone to help you out.
Here are the steps:
- Click Mailjet’s “My Account”
- Now click ” Setup SPF/DKIM Authentication”
- Then go to “Manage”
- Follow the directions to configure “Set up SPF”
- Follow the directions to configure “Set up DomainKeys/DKIM”

TEST: You will know you are complete when you get Double Green notifications.
Add an “allowed” sender in MailJet
This step is important to protect against sender abuse. Before being allowed to send email through the MailJet relay, the appropriate email addresses must be “validated” through MailJet. MailJet allows one of two options: Either (a) validate the whole domain, which means that all email addresses from that domain are allowed to use the relay (this requires access to DNS), or (b) validate individual email addresses (this requires receive access to each of the email addresses. Initially, the account that has been validated through the setup process is allowed to send email on behalf of this domain.
To set up the “allowed” senders, go to Setup, then enter the ” Add a Sender Domain or Address” area. From there decide if you wish to validate the domain or individual addresses.
TEST: Wait for the “You have successfully validated” report from MailJet.
2. Integrate into WordPress (outbound emails from WordPress)
Mailjet Integration into WordPress is made very easy by way of a Plugin. By doing so, all emails sent from your WordPress instance on your domain are actually handled by Mailjet. Let’s consider, why would you even want to do this if you are already getting emails from your domain? For several reasons, one of which is that this way emails from your domain to your users are actually tracked
Here are the steps:
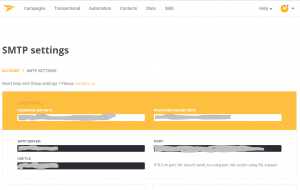
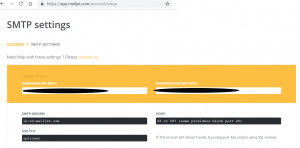
1. First, obtain the Mailjet USERNAME and PASSWORD by
- logging into Mailjet.com
- going to My Account
- clicking on SMTP and SEND API Settings
- Keep the USERNAME and PASSWORD handy, you’ll need them shortly.
The rest of the task is completed within WordPress. Log into WordPress as an admin and do the following
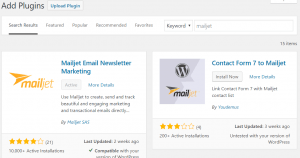
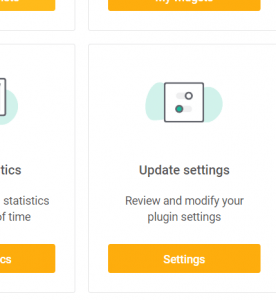
2. Install and Activate the Mailjet Plugin in WordPress
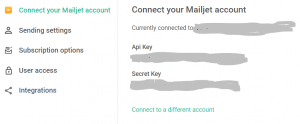
3. Open the Mailjet Settings on WordPress main menu

4. Enter the appropriate credentials (both the USERNAME (API KEY) and PASSWORD (SECRET KEY) are necessary)
5. Configure the following parameters:
- Enable sending emails through Mailjet (Enabled)
- Port to use for SMTP communication (select 587)
- Enable SSL communication with mailjet.com (cannot be selected)
- Send test email now (Sure, why not! Email is free!)
- Recipient of test email (for example, your-personal-email@gmail.com)
- From: email address (use one of the configured email addresses on your domain). Note, this email address will be the From email for all emails sent from the WordPress instance to any of your users, such as password change requests. I’d recommend something like “donotreply@yourdomain.com”
Now, click Save Options.
TEST: “Your test mail from Mailjet!” You should receive a test email to the email address that you specified above. If you do not receive this test email, then you need to diagnose the system.
Integrate Mailjet into your favorite mail software (outbound personalized emails!)
Finally, integrate the mail handler into your favorite email software. To get a little technical but still keep this simple, Email software is called Personal Information Manager (or PIM). Common PIMs are Outlook, Thunderbird, the hotmail web interface, and the gmail web interface.
I use gmail as the PIM, and configure a “send as” account that attaches to MailJet. Here are the steps to integrate Mailjet into the gmail web interface:
1. Open gmail.com and log in with your normal gmail account that you’d like to use to send emails on behalf of this domain
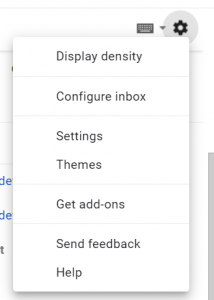
2. Open the Settings
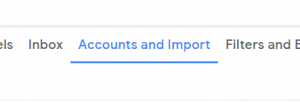
3. Open the “Accounts and Import” tab
4. Click “Send mail as”
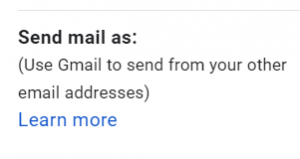
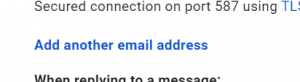
5. Add another email address
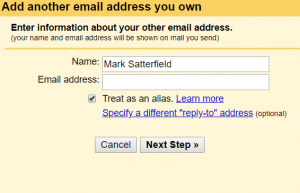
6. Add the name that you’d like to be known by, as well as an email address that you’ve configured in Mailjet
7. Add the SMTP Server, Username, and Password from Mailjet
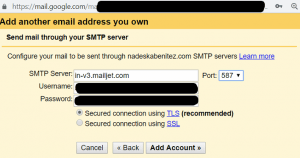
8. Click Add Account
And you are done!
TEST: Now, test the gmail/PIM integration by sending an email “From” your domain “To” Somewhere. If it doesn’t work, then you’ll have to do some investigation which is beyond the scope of this tutorial. However, feel free to email me and I’ll do what I can to help you out.
A few notes on mail handling
- Keep it simple! The simpler the better.
- Keep email protected and email reputation clean by tightening down your domain’s SPF and DKIM. Test them both vigorously.
- Get familiar with tools! For example, test your site with mxtoolbox where necessary.
- Use a unique Mailjet account for each domain.
Debugging
Integration failure has been reported by some users. I’m working with Mailjet to identify the problem.

The test email could not be sent. Please make sure your server doesn’t block the SMTP ports. Also double check that you are using correct API and Secret keys and a valid sending address from your Mailjet account.
Mailjet configurator
I’ll report back as soon as I know what is going on.
Conclusions
Email is important. Whether it be to email blast your customers, or contact them for specials, or request payments, or simply to say hello, email is a critical communications component of any business.
This article provided a concrete outbound email integration solution. By the end of the tutorial, you should be able to send both group and single transactional emails to your friends, family, and customers.
If you need any particular help with your domain, contact me via email.
Leave a Reply
You must be logged in to post a comment.